
These homemade Twix bars are easier than you think and so satisfying to make. Each layer comes together simply, and you can prep them ahead. They slice beautifully and feel special without being fussy. Perfect for weekend baking or gifting.
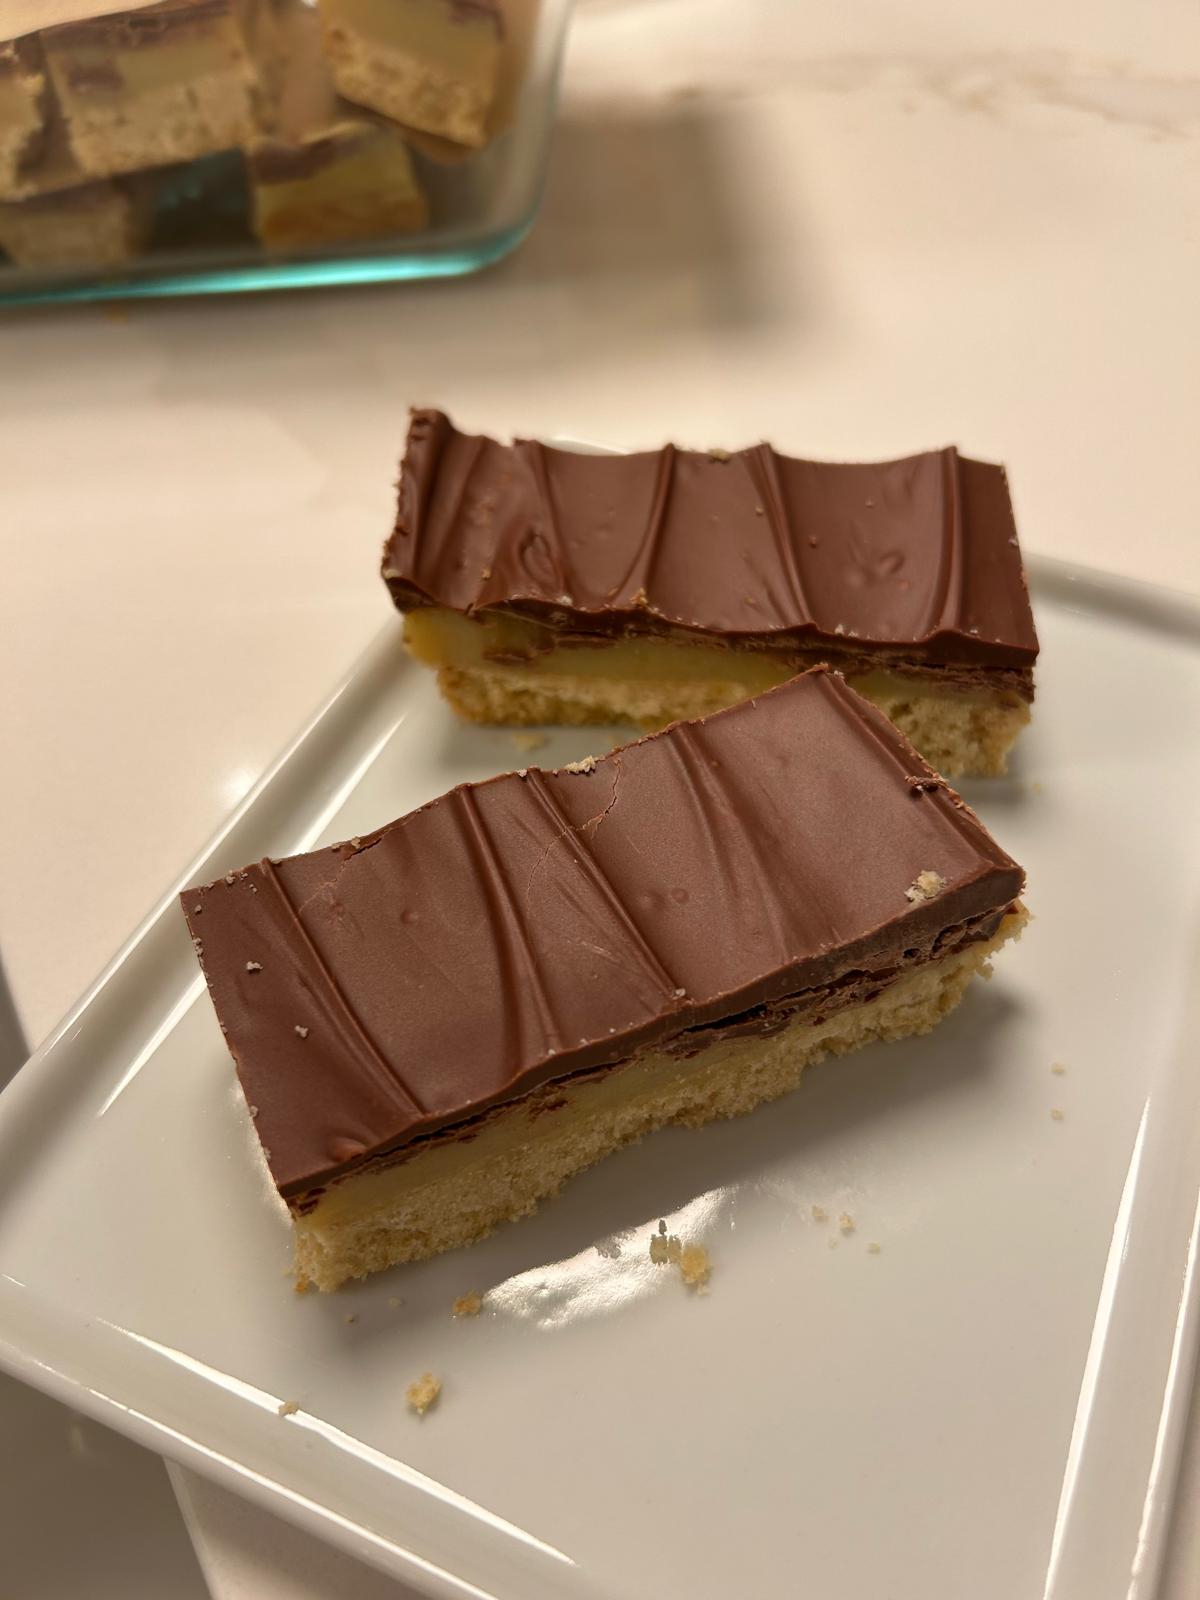
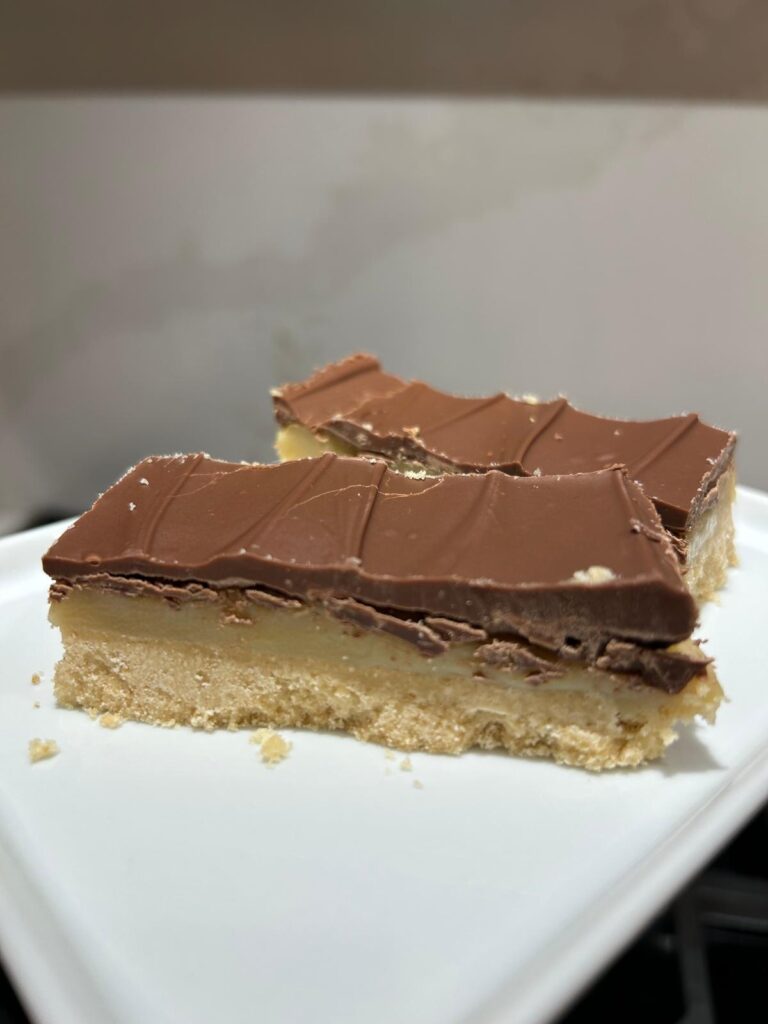
The real secret is letting each layer shine on its own. The cookie base is crisp and buttery, almost shortbread like. The caramel is rich, soft, and deeply golden from slow stirring. Then comes the chocolate, smooth and snappy once chilled. Together, they taste like a classic candy bar, only fresher and more indulgent.
I love how this recipe invites you to slow down. Pressing in the base feels grounding. Stirring the caramel becomes almost meditative. Pouring the chocolate on top is the reward. Every step builds toward those clean slices at the end.
These bars are ideal for sharing. Cut them small for a dessert platter or slice them generously for a proper treat. They also store well, which makes them great for entertaining or planning ahead for busy weeks.
Use good quality ingredients here. Real butter makes the base tender and flavorful. Sweetened condensed milk creates that signature caramel texture. Milk chocolate keeps the flavor nostalgic and comforting.
Serve them chilled for neat layers or let them sit briefly for a softer bite. Either way, they disappear fast. Once you make them, you’ll want to keep this recipe close. It’s a classic you’ll come back to again and again.

Homemade Twix Bars
Equipment
- 9 x 9 inch baking tin
- Small Saucepan
- Parchment
Ingredients
For the cookie base
- 1.5 cups all purpose flour 190g
- 0.5 cup very cold butter cubed (113g)
- 3 tablespoons brown sugar
For the caramel
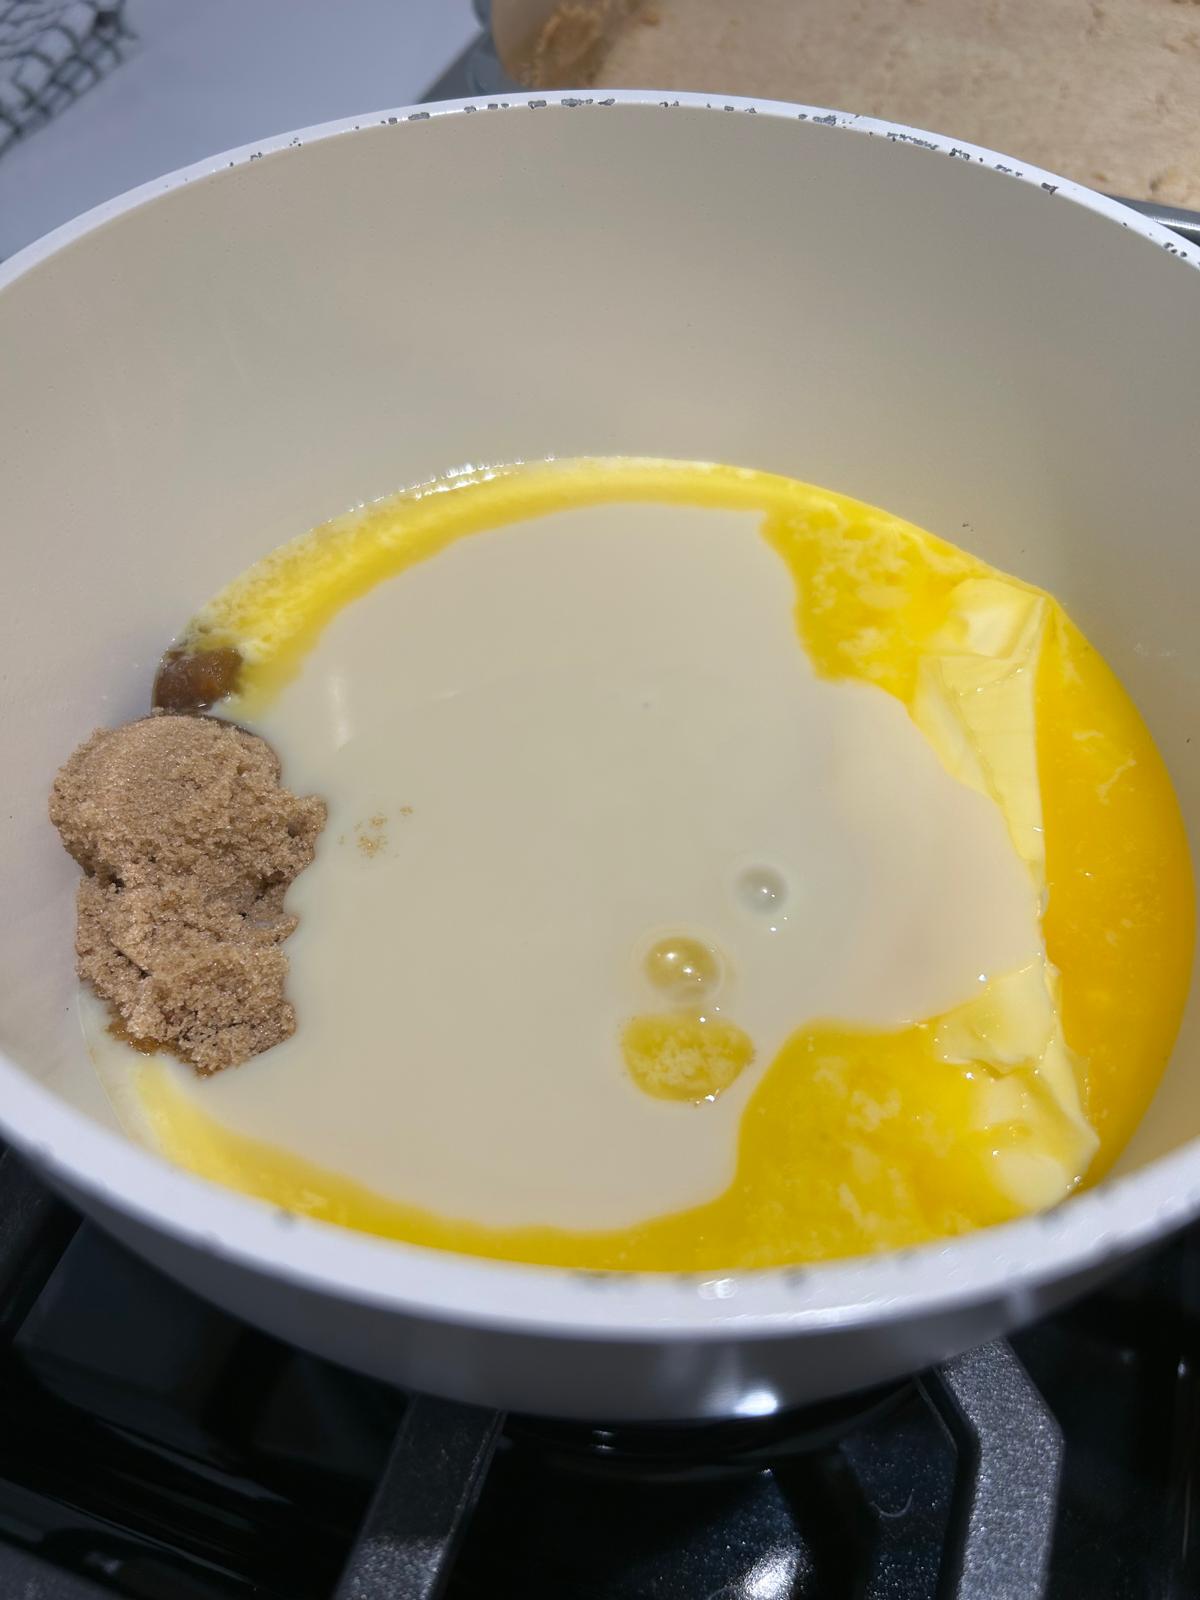
- 1 can sweetened condensed milk 14 oz (397g)
- 0.75 cup butter 170g
- 3 tablespoons brown sugar
For the chocolate top
- 6 oz good quality milk chocolate chopped (170g)
Instructions
- Preheat the oven to 350ºF / 180ºC and grease and line a 9 inch square baking tin
- Place the butter and flour and sugar for the cookie base into a food processor and pulse until you see the mixture resemble fine crumbs. Continue pulsing until the dough starts to stick together then tip into the base of the baking tin.
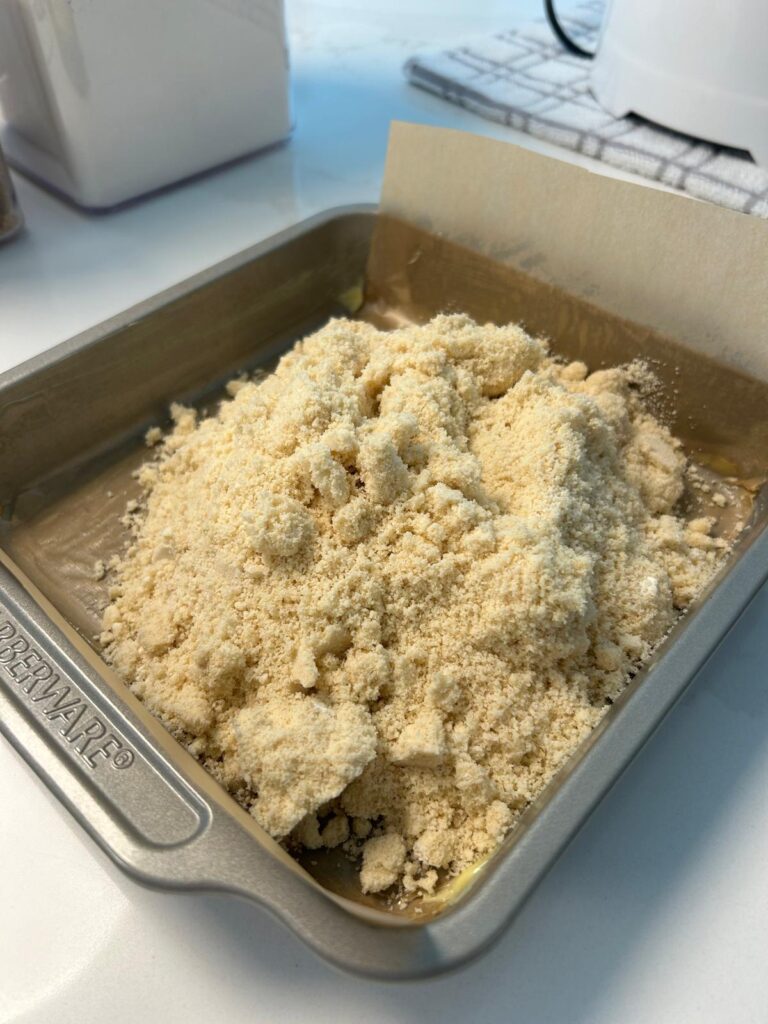
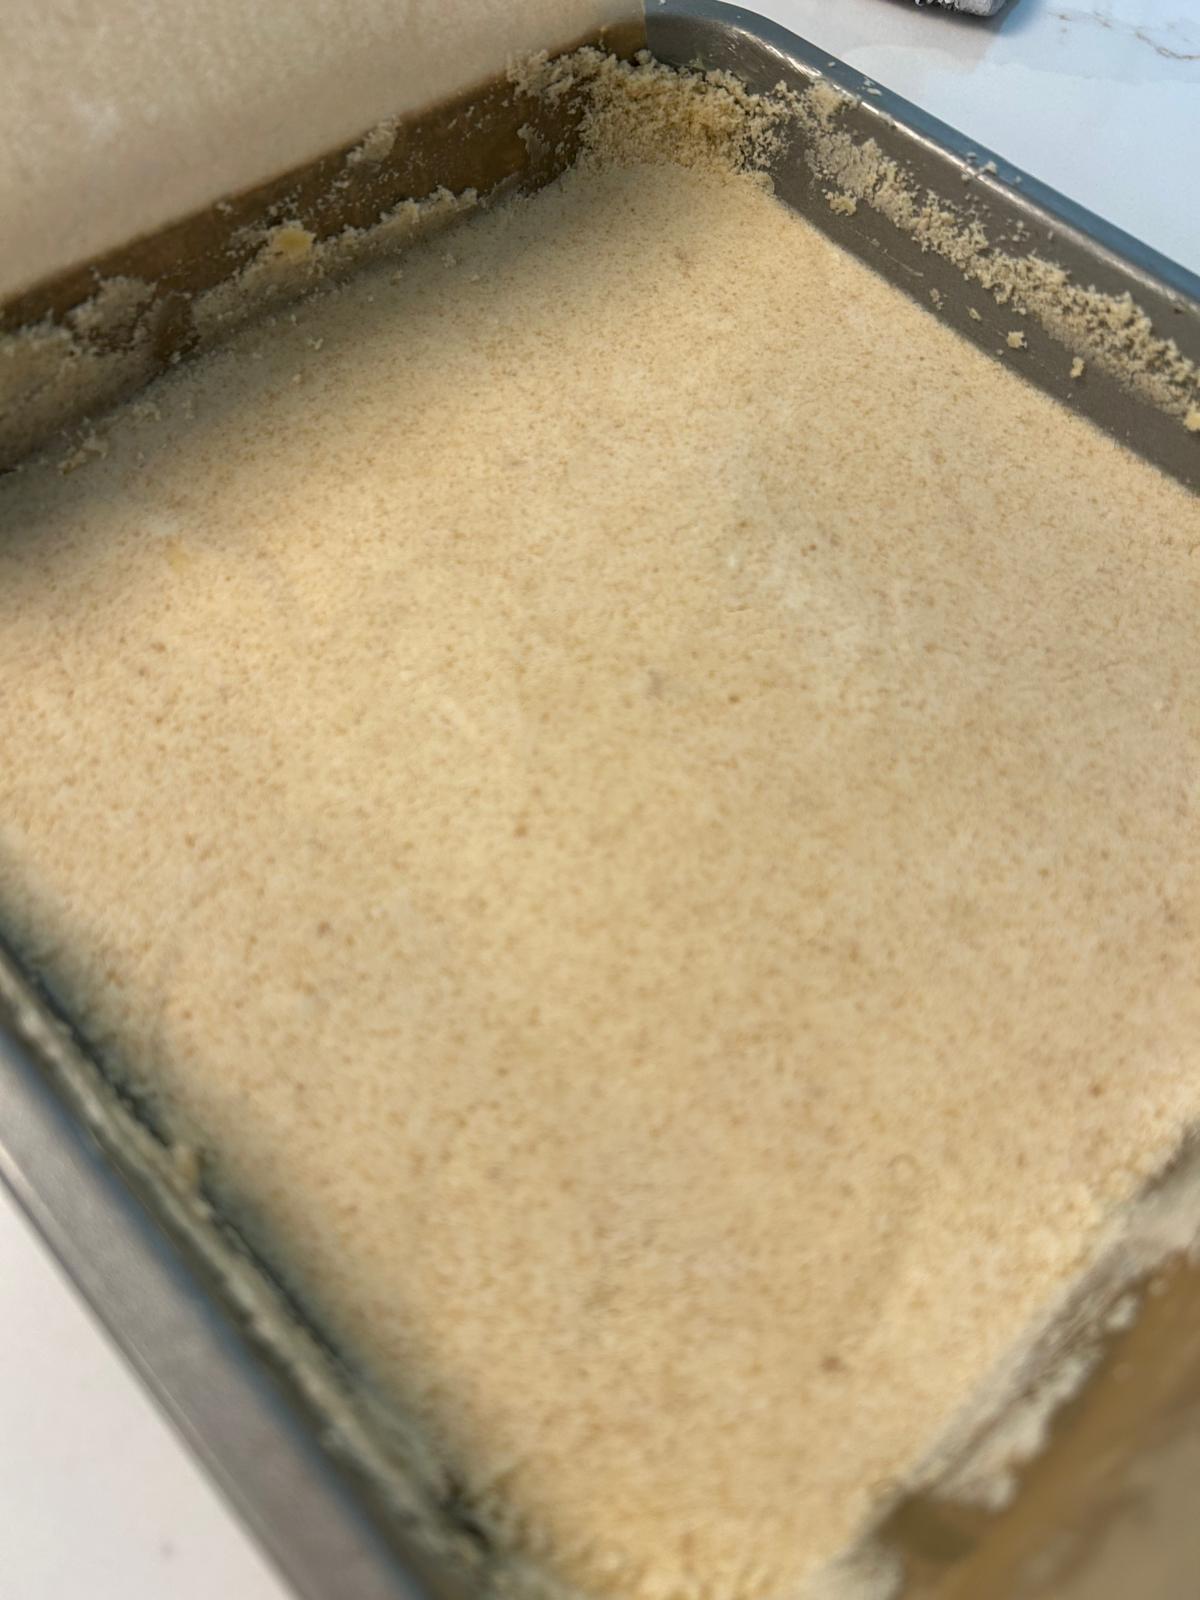
- Press into an even layer, I use the back of a measuring cup to do this. Prick all over with a fork then bake for 15 to 20 minutes until starting to turn a pale golden brown.

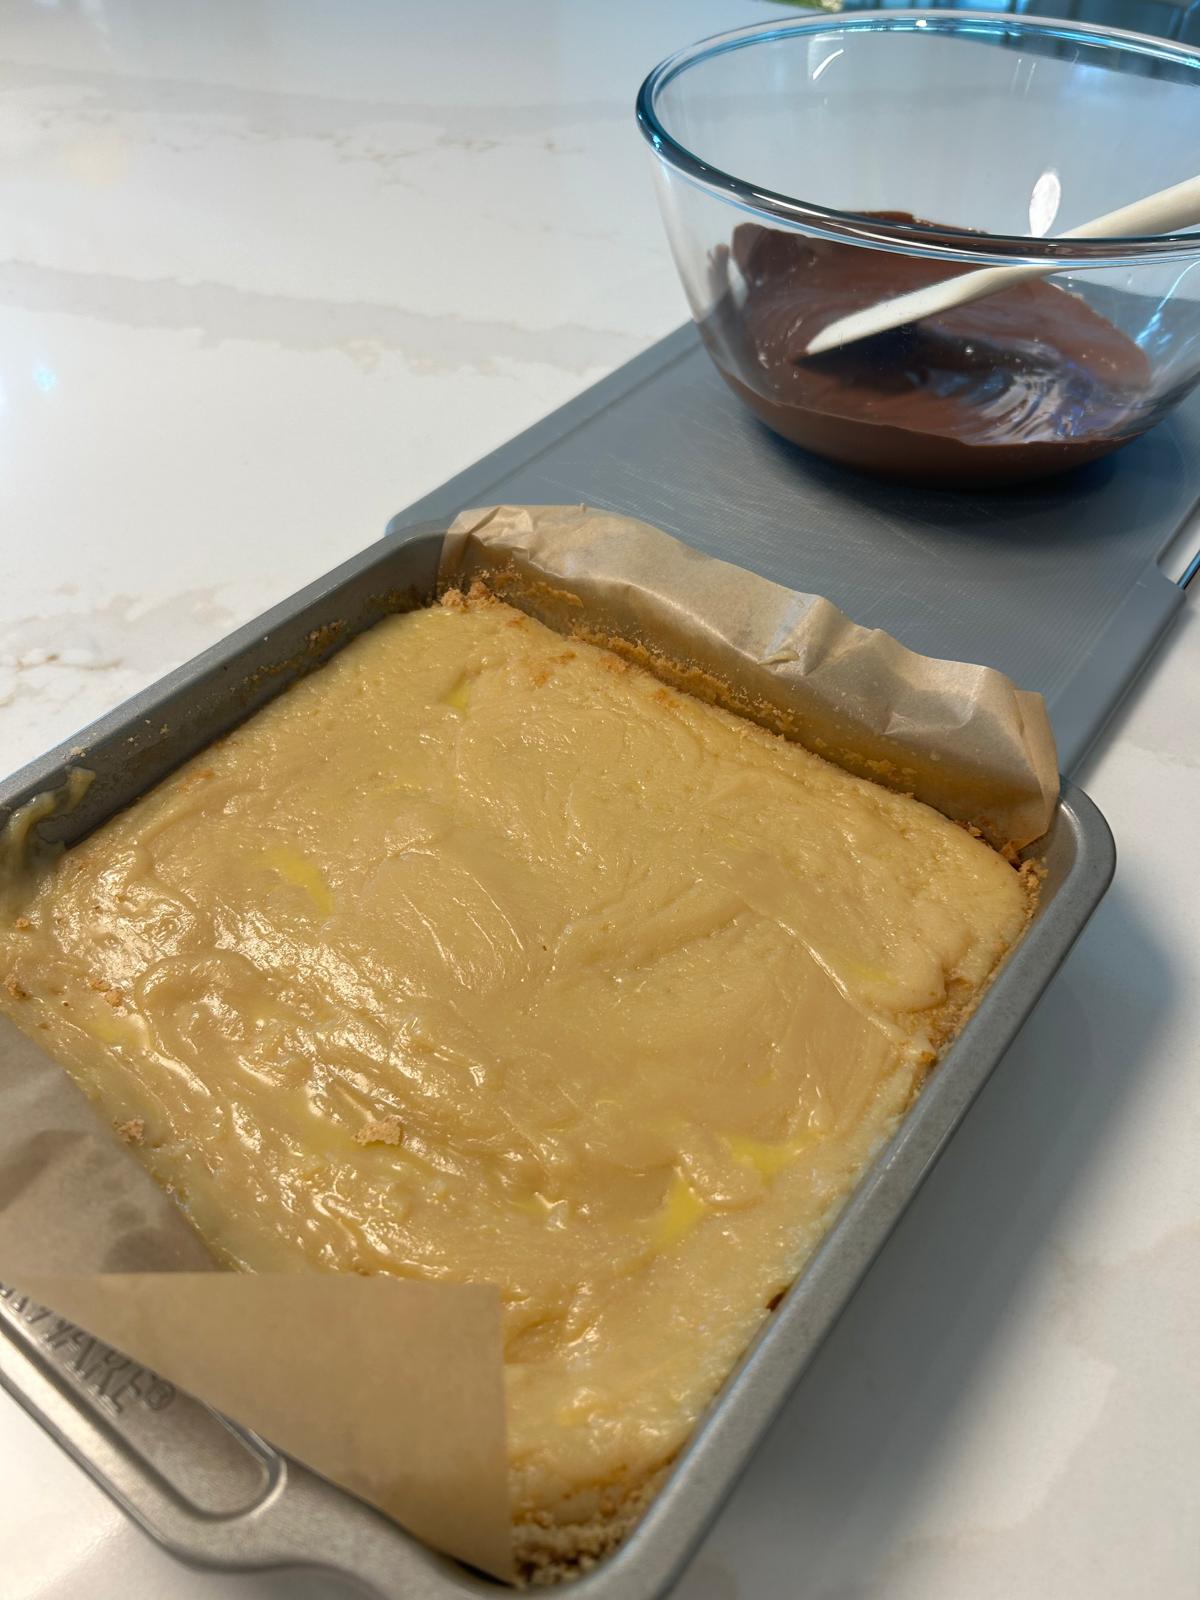
- Remove from the oven and allow to cool completely.

Now make the caramel:
- Place the condensed milk, butter and brown sugar into a saucepan and heat over a medium heat stirring continually. Allow to come to a gentle boil then reduce the heat to low and continue to heat and stir until the caramel turns light golden and starts to pull away from the sides of the pan. This should take around 10 to 12 minutes.

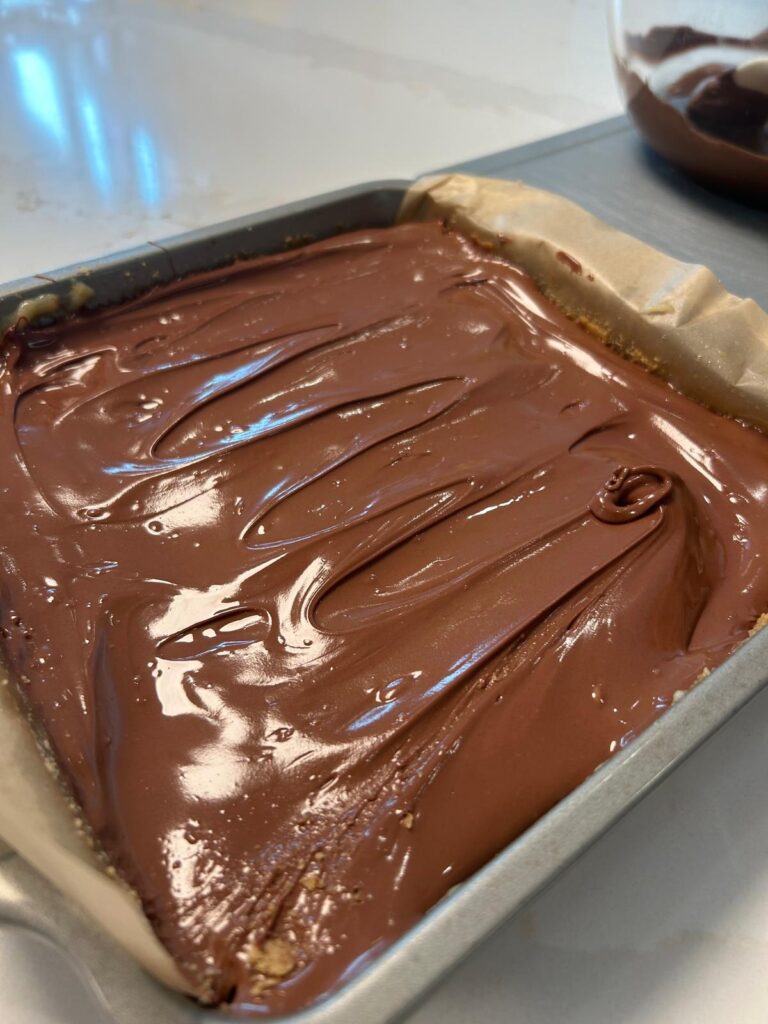
- Pour over the cooled cookie base.

- Place in the fridge to chill for at least one hour.
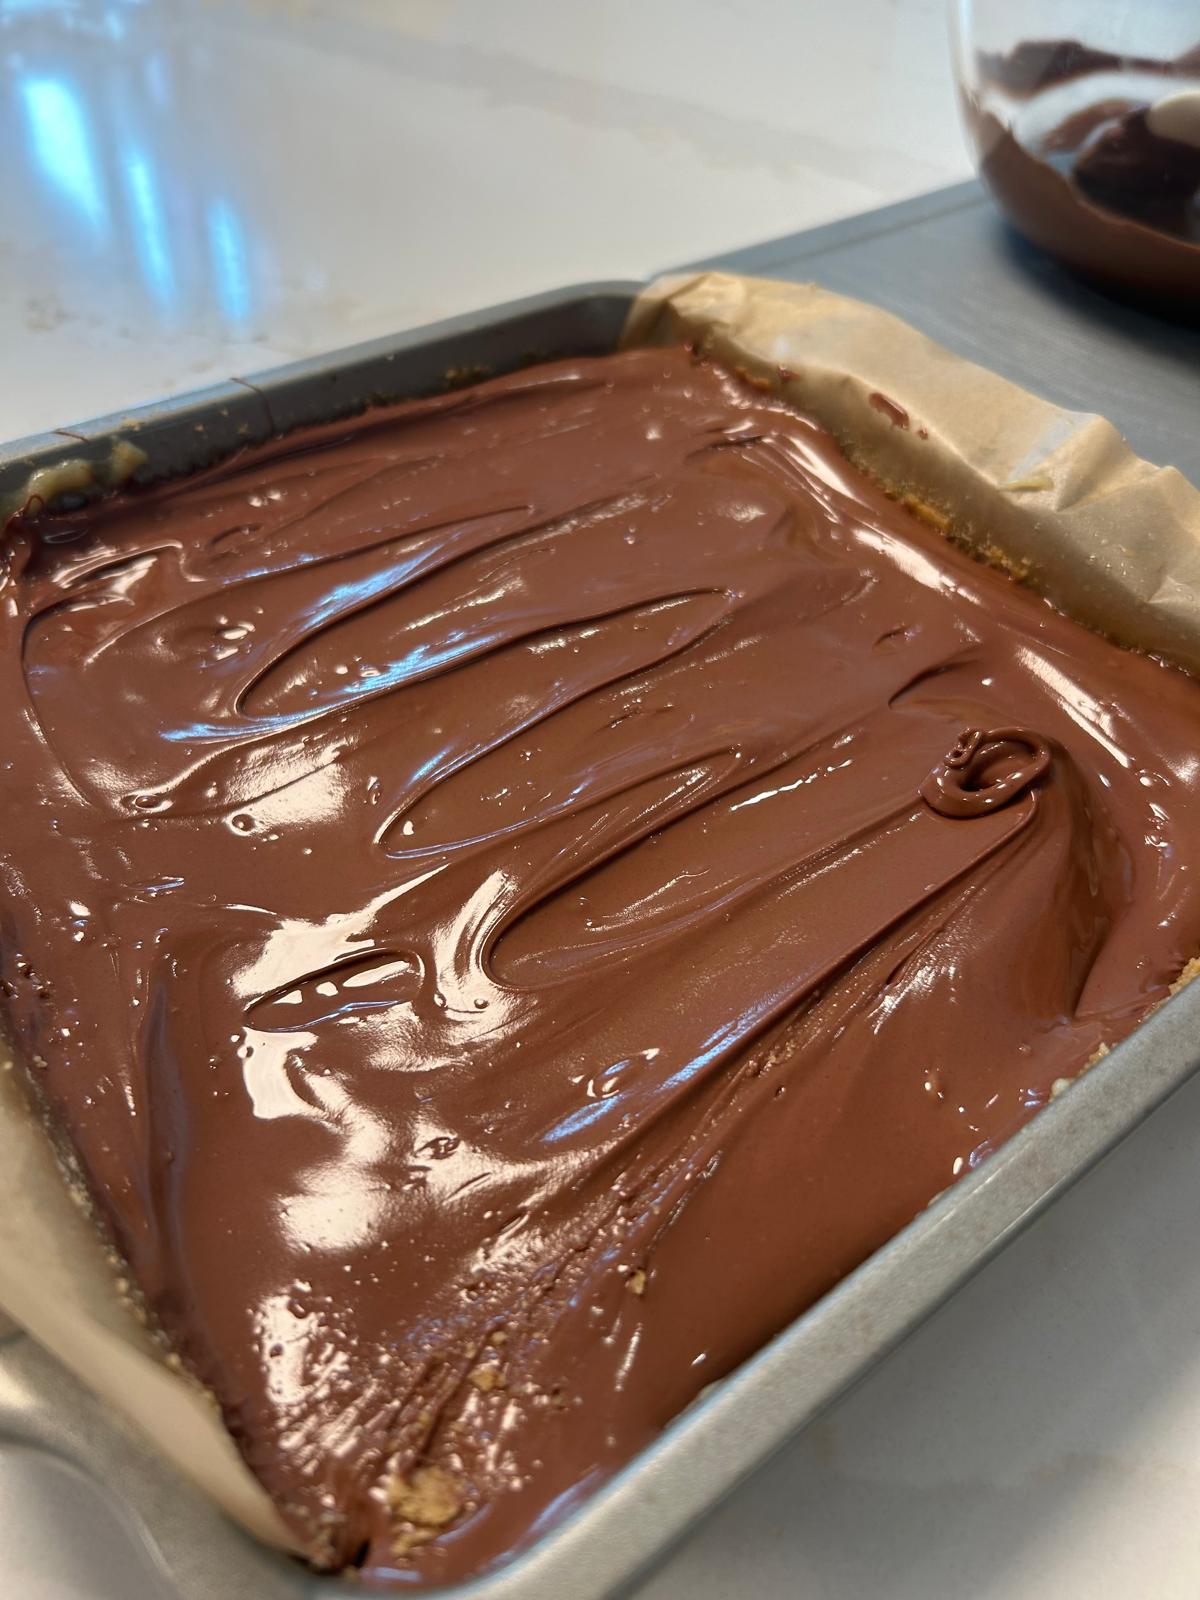
- Melt the chocolate and pour over the top of the chilled caramel then place back in the fridge to harden the chocolate for around 15 to 30 minutes
- Slice and serve.
- If you want to store leftovers, place between parchment paper and store in the fridge for up to one week.
Did you make this recipe?
Please let me know how it turned out for you! Leave a comment below and tag @Addthelove_ on Instagram and hashtag it #Addthelove.
This recipe may include affiliate links. If you decide to buy through these links, I may earn a small commission at no additional cost to you.